If you prefer to install something yourself, always follow a professional guide. Below is our step-by-step instructions on how to install a reverse osmosis system, written by our water filtration experts.
Understanding Reverse Osmosis Systems
A reverse osmosis system removes impurities and contaminants in water with a semi-permeable membrane, a type of advanced water filtration technology. Pressure pushes water through this membrane to only allow clean water molecules to pass through while simultaneously blocking larger molecules, such as salts, minerals, and contaminants. This results in purified drinking water free from unwanted substances, making it a popular choice for residential and commercial use.
Benefits of Reverse Osmosis Water Filtration
- Significantly reduces harmful contaminants like lead, chlorine, nitrates, and other toxic substances.
- Enhances the odor and taste of tap water.
- Is more cost-effective in the long run than bottled water. Installing an RO system yields high ROI investment for homes and businesses because the cost of storing bottled beverages is eliminated.
- Are compacted and easy to install in various spaces such as kitchens and offices.
Types of Reverse Osmosis Systems You Can Install DIY
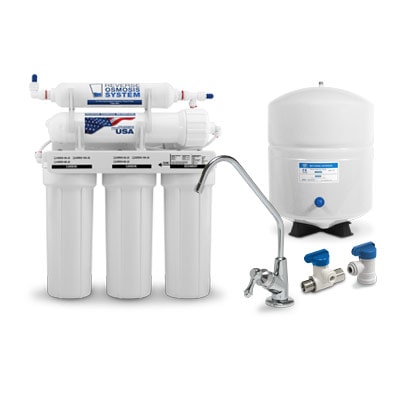
- Under-sink reverse osmosis systems are installed directly beneath a sink and connected to the existing plumbing. They are discreet and efficient, providing fresh water for a single faucet.
- Countertop reverse osmosis systems are portable and can be easily moved or stored when not in use. This type is ideal for renters or those who prefer a non-permanent installation.
- Whole-house reverse osmosis systems filter water for every tap or faucet in a space; purified water can be used for cleaning, bathing, and washing clothes. Due to their complexity, these systems often require professional installation, but offer comprehensive water treatment for larger households.
Preparation: How to Install a Reverse Osmosis Water System
Proper preparation guarantees a smooth reverse osmosis system installation process. Visit our more extensive RO installation guide on how to install a reverse osmosis system for more detailed instructions, an installation diagram, color images of the tools you should use, troubleshooting tips, maintenance help, and a pressure temperature chart.
Completing steps 1 and 2 before gathering your tools and parts helps you determine if any pre-filters or additional equipment are necessary to prepare your water for installing reverse osmosis.
- Assess your water supply and pressure requirements. Most reverse osmosis systems operate best with a 40 to 100 psi water pressure. If your water pressure is below this range, consider installing a booster pump to certify optimal performance.
- Check for specific requirements related to your water source, such as temperature and chlorine levels.
- Choose the best location for your reverse osmosis system (ideally under the kitchen sink, where it can be easily connected to the cold water supply and the dedicated faucet). Ensure there is enough space for all components. Future accessibility should be considered for maintenance and filter changes. If your system requires power for a pump or other features, make sure the area is well-ventilated and has a nearby electrical outlet.
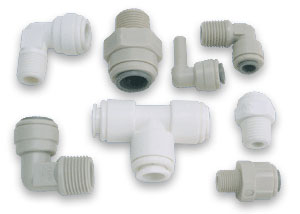
- Gather the tools and materials needed for the installation (wrench, screwdriver, drill, Teflon tape, and a bucket to catch any spills).
- Lay out all the components of your RO system (unit, storage tank, faucet, membrane, filters, and necessary tubing) in front of or next to you.
- Always wear safety goggles to protect your eyes from debris, and make sure your work area is well-ventilated.
- If using power tools, adhere to all safety guidelines to prevent accidents.
Step-by-Step Installation Guide: How to Install a Reverse Osmosis System
- Turn off the water supply to prevent any leaks.
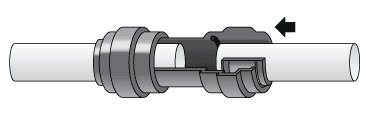
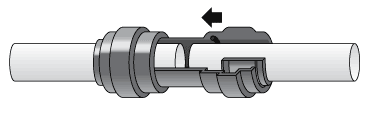
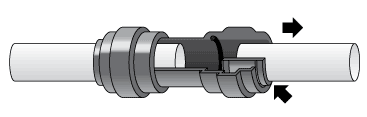
- Disconnect the cold water line from the sink using your wrench.
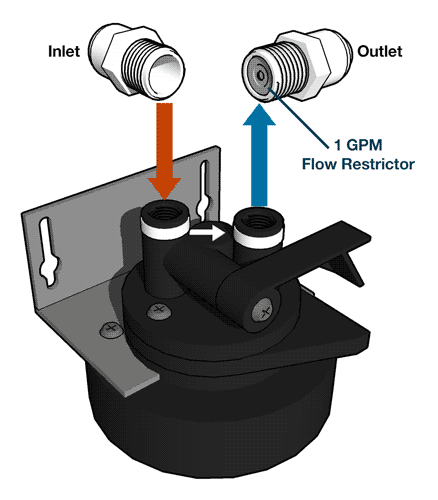
- Attach the new feed water adapter from your reverse osmosis system to the cold water line.
- Tighten the water adapter securely to avoid any future leaks.
- Only after connecting the feed water adapter, install the faucet of your RO system.
- If necessary, drill a hole in the countertop, taking care not to damage any plumbing or wiring.
- Once the faucet is in place, connect the tubing from the faucet to the RO unit according to the manufacturer’s instructions.
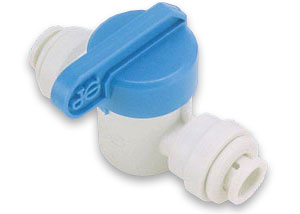
- Connect the storage tank.
- Place the tank in the designated area and attach the tank connector to the tank.
- Verify that all connections are tight to avoid leaks.
- Connect the drain line to the system, making sure it runs to your sink’s drain. This is where the wastewater will be expelled.
- Before turning the water supply back on, double-check all connections to be certain everything is secure.
- Slowly turn the water supply back on and do another leak check at all connection points.
- After ensuring no leaks, let the system fill its storage tank, which may take a few hours.
Visit our cleaning and replacing filters guide for reverse osmosis filter installation. If you encounter common installation issues, like leaks or low water flow, check all connections to confirm they are tight. If you notice leaks, it may be due to improperly tightened fittings or damaged washers. Confirm that the feed water valve is fully open and the filters are correctly installed for low water flow.
Contact our water filtration experts if problems persist, or reread your product manual.