Whole House Filtration System Replacement Water Tanks
Showing all 4 results
-

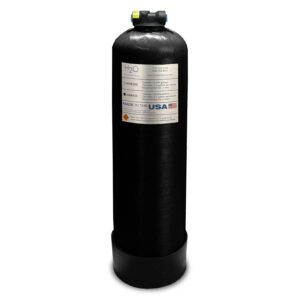
H2O WHR300 Whole House Filtration System Replacement Tank for NSA 300H with 3/4″ Ports (6″ x 35″)
$339.00- Catalytic Carbon Media
- Replacement Tank for NSA 300H & NSA 300HR
- Removes Chlorine, Taste, Odor & Sediment
- Reduces Chloramines
- Reduces Chemical Contaminants
- Same Height & Diameter as NSA Tank
- 75,000 Gallon Capacity
- 12-Month Pro-Rata Warranty
-
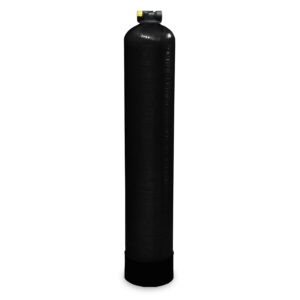
H2O WHR935 Whole House Filtration System Replacement Tank Upgrade for NSA 300H w/ 3/4″ Ports (9″ x 35″)
$519.00- Catalytic Carbon Media
- Removes Chlorine, Taste, Odor & Sediment
- Reduces Chloramines
- Reduces Chemical Contaminants
- Upgrade Tank for NSA 300H & NSA 300HR
- Same Height as NSA Tank
- Increased Flow Rate & Longer Life
- 3″ Larger Diameter
-
H2O WHR948 Whole House Filtration System Replacement Tank with 3/4″ Ports (9″ x 48″)
$659.00- 1.5 Cu. Ft. Catalytic Carbon Media
- Removes Chlorine, Taste, Odor & Sediment
- Reduces Chloramines
- Reduces Chemical Contaminants
- 5 – 7 Gallons Per Minute
- 3/4″ FNPT Connections
-
H2O WHR1054 Whole House Filtration System Replacement Tank with 3/4″ Ports (10″ x 54″)
$819.00- 2.0 Cu. Ft. Catalytic Carbon Media
- Removes Chlorine, Taste, Odor & Sediment
- Reduces Chloramines
- Reduces Chemical Contaminants
- 8 – 10 Gallons Per Minute
- 3/4″ FNPT Connections
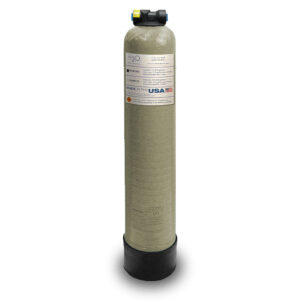

If your whole house filtration system isn’t performing as well as it used to, shop our replacement water tanks. The tank is one of the first components to check. Replacement tanks restore the physical “home” for your filtration media, allowing your system to maintain flow, protect downstream components, and deliver consistent water quality throughout the house.
Whole House Filtration System Replacement Water Tanks
What does a replacement whole house tank do?
A replacement tank is the pressure vessel that holds filtration media for whole house treatment. When a tank is worn, damaged, or no longer a reliable fit for your valve and plumbing, replacing it helps reset your system to a clean, stable baseline for performance and maintenance.
When is it time to replace the whole house filtration system water tank?
You may need a replacement tank if you notice:
- A decline in water pressure throughout the home that is not explained by clogged cartridges or plumbing restrictions
- Unusual taste, odor, or discoloration returning after filters or media should still be working
- An older tank that may be accumulating sediment, scaling, or internal buildup
- Visible damage, leaks, cracking, or corrosion concerns on the tank or connections
Replace vs upgrade
Replace like-for-like when:
- You want the same footprint and the simplest swap
- Your current system was sized correctly, and you are happy with the performance
Choose an upgrade when:
- Your household demand has increased, and peak flow now feels undersized
- You want to improve fit, capacity, or long-term efficiency during the replacement
- You are already making major changes and want a smarter long-term setup
How do I Choose the Right Whole House Filtration System Replacement Water Tank?
Use this checklist to avoid misorders and installation headaches.
Compatibility
- Confirm the model or tank type you are replacing
- Confirm your control valve model and the tank opening it requires
- Confirm connection size and plumbing layout
Tank size and capacity
- Match your space and clearance first
- Then match your performance needs based on peak household demand, meaning how many fixtures can run at once
Material and durability
- Choose tanks built from durable, corrosion-resistant materials intended for long service life
Installation practicality
- Confirm you have access to the tank location for removal and replacement
- Confirm you can route any required drain line if your system backwashes
- Confirm you have shutoffs and a bypass, or plan to add them for easier future service
Quick “before you buy” checklist
- Current tank label or model confirmed
- Valve model confirmed
- Connection size confirmed
- Height and diameter clearance measured
- Bypass present or planned
- Drain routing confirmed if backwashing is part of your system
- Installation plan confirmed, DIY versus installer
Installation Overview
Follow your product instructions and local plumbing requirements. This is a high-level overview.
- Shut off the main water supply.
- Depressurize the system and set it to bypass if available.
- Disconnect plumbing connections and any drain line if applicable.
- Remove the old tank and prepare the installation area.
- Install the new tank and reconnect the valve and plumbing connections.
- Restore water slowly and check all connections for leaks.
- Flush and start up the system according to the instructions.
- Recheck for leaks after a short run time and again later the same day.
Maintenance Basics for Whole House Replacement Water Tanks
Replacement tanks are low-touch, but a few simple habits protect performance:
- Inspect connections periodically for signs of seepage or wear.
- Maintain your filter cartridges or media on schedule so the tank system is not overloaded.
- Keep the system area clean and accessible for service.
- Verify pressure and flow are stable over time so you can catch issues early.
Troubleshooting tips
If you notice performance changes:
- If pressure drops significantly, check for clogged filters, restrictions, or a pressure regulator issue.
- If water quality declines, confirm maintenance is current and that the system is operating as intended.
- If you see leaks, inspect connection points and seals, then tighten or replace worn parts as needed.
- If the tank does not fill or empty as expected, confirm valves are positioned correctly and that the system is not blocked.
FAQs on Replacement Water Tanks
Q: How do I know which replacement tank I need?
A: Match your current tank model or system documentation first, then confirm your valve model, connection size, and available clearance.
Q: Will a replacement tank improve water pressure?
A: It can if the old tank or system setup was restricting flow, but pressure issues can also come from clogged filters, plumbing restrictions, or a pressure regulator problem.
Q: Do I need a bypass for a replacement tank install?
A: A bypass is strongly recommended because it makes installation and future maintenance much easier.
Q: Is a replacement tank the same as a whole new filtration system?
A: No. A replacement tank restores the tank component. You still need the correct valve, media, and maintenance plan for your overall system.
Q: Should I replace the filtration water tank or upgrade it?
A: Replace like-for-like for the simplest swap. Upgrade if your home demand has increased or you want improved long-term performance.
Q: Can I install a whole house filtration system replacement water tank myself?
A: Some experienced DIYers can, but compatibility, plumbing connections, and startup steps must be correct. An installer is a good option if you want the lowest-risk outcome.
Confirm your current tank model, valve, and connection size, then choose a replacement whole house tank that fits your system and restores reliable performance throughout your home.