Whole House Filtration System Replacement Water Tanks
Showing all 4 results
-

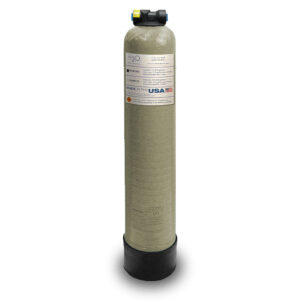
H2O WHR300 Whole House Filtration System Replacement Tank for NSA 300H with 3/4″ Ports (6″ x 35″)
$339.00- Catalytic Carbon Media
- Replacement Tank for NSA 300H & NSA 300HR
- Removes Chlorine, Taste, Odor & Sediment
- Reduces Chloramines
- Reduces Chemical Contaminants
- Same Height & Diameter as NSA Tank
- 75,000 Gallon Capacity
- 12-Month Pro-Rata Warranty
-
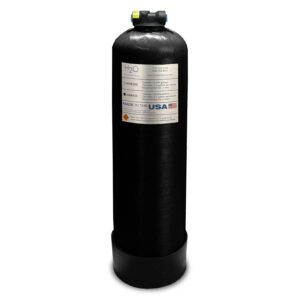
H2O WHR935 Whole House Filtration System Replacement Tank Upgrade for NSA 300H w/ 3/4″ Ports (9″ x 35″)
$519.00- Catalytic Carbon Media
- Removes Chlorine, Taste, Odor & Sediment
- Reduces Chloramines
- Reduces Chemical Contaminants
- Upgrade Tank for NSA 300H & NSA 300HR
- Same Height as NSA Tank
- Increased Flow Rate & Longer Life
- 3″ Larger Diameter
-
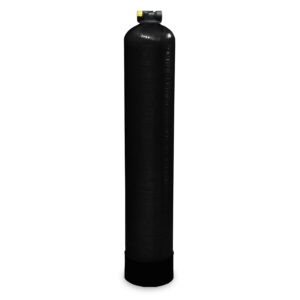
H2O WHR948 Whole House Filtration System Replacement Tank with 3/4″ Ports (9″ x 48″)
$659.00- 1.5 Cu. Ft. Catalytic Carbon Media
- Removes Chlorine, Taste, Odor & Sediment
- Reduces Chloramines
- Reduces Chemical Contaminants
- 5 – 7 Gallons Per Minute
- 3/4″ FNPT Connections
-
H2O WHR1054 Whole House Filtration System Replacement Tank with 3/4″ Ports (10″ x 54″)
$819.00- 2.0 Cu. Ft. Catalytic Carbon Media
- Removes Chlorine, Taste, Odor & Sediment
- Reduces Chloramines
- Reduces Chemical Contaminants
- 8 – 10 Gallons Per Minute
- 3/4″ FNPT Connections

Whole house filtration system replacement water tanks help restore flow, media performance, and reliable whole-home water treatment when an older tank is worn, damaged, undersized, or no longer a good fit for the system. These replacement tanks are built for whole-house carbon filtration applications and include options for like-for-like replacements as well as larger upgrade tanks for improved flow and longer service life.
Who It’s For
This category is a strong fit for homeowners replacing an aging whole house carbon tank, restoring an existing NSA 300H or NSA 300HR setup, or upgrading to a larger tank while maintaining a similar system footprint. It is especially useful for households that want to keep their current whole-house filtration system operating properly without replacing the entire setup.
What It Removes/Solves
These replacement tanks are designed for whole-house filtration systems that use catalytic carbon media to help reduce:
- chlorine
- chloramine
- taste and odor
- sediment
- chemical contaminants that affect water quality throughout the home
They also help solve system-performance problems tied to an aging or mismatched tank, including declining flow, returning water-quality issues, and a tank that no longer provides a reliable housing for the filtration media.
Replace vs. Upgrade Water Tanks
A like-for-like replacement is usually the right choice when the current system was sized correctly, the footprint needs to stay the same, and the goal is the simplest swap. An upgrade makes more sense when household demand has increased, peak flow feels undersized, or a larger tank would provide better long-term performance.
The available options in this category include:
- WHR300: 6″ x 35″, same height and diameter as the NSA tank, 75,000-gallon capacity
- WHR935: 9″ x 35″, upgrade tank for NSA 300H and NSA 300HR, same height with a 3-inch larger diameter for increased flow rate and longer life
- WHR948: 9″ x 48″, 1.5 cu. ft. catalytic carbon media, about 5 to 7 GPM
- WHR1054: 10″ x 54″, 2.0 cu. ft. catalytic carbon media, about 8 to 10 GPM
All four options use 3/4-inch ports, and the category filters also confirm polyglass construction, chlorine taste and odor, and chloramine reduction as key use cases.
Sizing and Selection Guidance on Replacement Water Tanks
Choosing the right replacement tank starts with compatibility. Confirm the current tank model, control valve model, connection size, and available installation clearance before ordering. Height and diameter both matter, especially when replacing a tank in a tight mechanical area or keeping an existing valve setup.
- A larger upgrade tank can be a smart move when more fixtures are running at once or when a stronger whole-house flow is needed.
- The smaller WHR300 and WHR935 options are useful when preserving the footprint of an NSA 300H-style setup matters most.
- The taller 9″ x 48″ and 10″ x 54″ tanks are better suited for households that need more media capacity and higher flow.
- If the system includes backwashing, confirm drain-line routing as part of the replacement plan.
Before You Buy:
- Confirm the current tank label or model
- Confirm the valve model
- Confirm 3/4-inch connection size
- Measure height and diameter clearance
- Confirm whether a bypass is already installed
- Confirm drain routing if the system backwashes
- Decide whether the project will be DIY or installer-led
Installation Overview
Replacing water tanks requires shutting off, depressurizing, reconnecting, starting up, and performing leak checks. The basic process is:
- Shut off the main water supply.
- Depressurize the system.
- Disconnect plumbing and any drain line if applicable.
- Remove the old tank.
- Install the new tank.
- Reconnect the valve and plumbing.
- Restore water slowly.
- Flush and start up the system according to the product instructions.
Local plumbing requirements and the exact valve and system configuration should always guide the final installation approach.
Maintenance and Replacement Guidance for Replacement Water Tanks
Replacement tanks are relatively low-touch, but long-term performance still depends on regular inspection and proper system upkeep. Check connections for seepage or wear, keep the system area accessible, and stay on schedule with cartridge or media maintenance so the tank system is not overloaded. It is also smart to monitor pressure and flow over time so small problems can be caught early.
If performance changes after installation, start by checking for clogged filters, restrictions, worn seals, improper valve position, or other system issues before assuming the new tank is the problem. If water quality declines, confirm that the full filtration setup, including media and maintenance intervals, is still matched to the home’s needs.
Why Buy From H2O Distributors?
H2O Distributors offers replacement whole house tanks built for catalytic carbon filtration, with options for direct NSA-style replacement and larger upgrade paths. Compare tank size, dimensions, gallon capacity, media capacity, and flow potential, while getting direct phone support, free shipping on qualifying orders, and products built from durable polyglass materials with 3/4-inch ports for compatible whole-house applications.
Frequently Asked Questions on Replacement Water Tanks
Q: How do I know which replacement tank I need?
A: Start by matching the current tank model, then confirm the control valve, 3/4-inch connection size, and available height and diameter clearance.
Q: Should I replace the tank with the same size or upgrade?
A: Replace like-for-like for the simplest swap. Upgrade when household demand has increased, or the current system feels undersized at peak flow.
Q: What do these replacement tanks help reduce?
A: These catalytic carbon tanks are used in whole-house systems designed to reduce chlorine, chloramine, taste, odor, sediment, and certain chemical contaminants.
Q: Will a replacement tank improve water pressure?
A: It can if the old tank or setup was restricting flow, but pressure problems can also come from clogged filters, plumbing restrictions, or pressure-regulator issues elsewhere in the system.
Q: Do I need a bypass when replacing a whole house tank?
A: A bypass is strongly recommended because it makes installation and future service much easier.
Q: Can I install a replacement whole house tank myself?
A: Some experienced DIYers can handle the job, but compatibility, plumbing connections, and startup steps need to be correct. Professional installation is a good option when reducing risk is a priority.
Confirm your tank size, valve, and connection details, then choose the replacement whole house tank that restores reliable flow and cleaner water throughout your home.